
Ham Radio
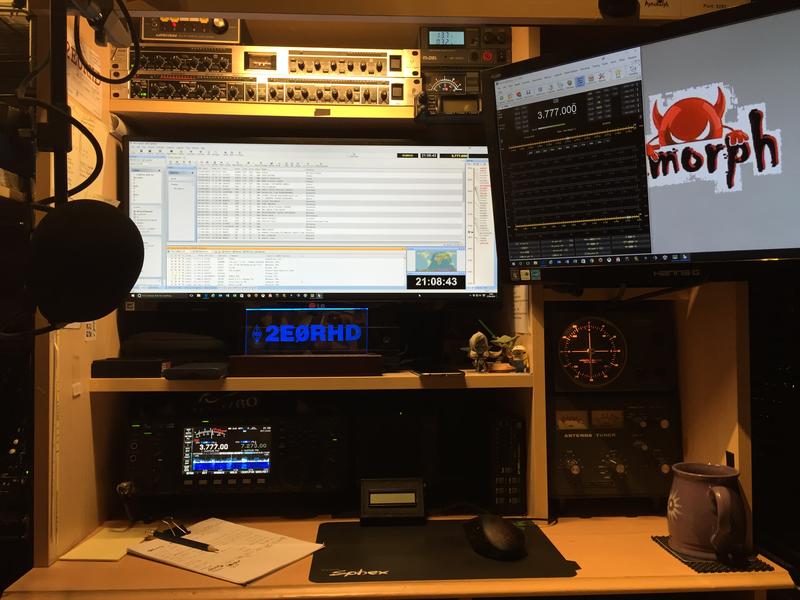
The Shack
My experiences as they unfold!
CQ CQ CQ, this is 2E0RHD…
I have been licensed since 2004 but I’ve been in the hobby from a young lad due to my older brother, Robert (G7GVC). He was in the Army and one of his fellow squaddies in the barracks had an old radiogram (if you’re to young to know what that is… Google it!) sat in the corner which had been gutted to house about three different amateur radios and various other radio equipment. This guy showed me things he’d built, things he was working on and even let me talk to someone on HF. That was it, I was hooked and I was only 10 years old at the time. My brother bought me a set of walkie talkies to keep my interested in radio and when I reached the age of 19, Rob told me he was going to get his class B license. So I join the Cheltenham Radio Club and eventually took my Class B exam. However, I failed the exam because at the time I was more interested in cars than in radios. In 2001 I relocated for work and moved up north to Hull. There I joined the local club and in 2004 took my Foundation (M3HAX) & Intermediate (2E0RHD) exams. Now I’ve now decided I want to get my Full License so I will be studying for that as it can now be taken online.
SOTA Activation – June 2017

This was done a while ago at GW SW-019 in Wales. It was my first attempt and even with all the preparation, it was a failure so far as an activation but a big success in finding out what I did wrong!! This lead to some of the projects below…
Home Brew – ATU – July 2017
Well I needed a small portable ATU to take with me on SOTA activations and after reading a few articles on-line I decided to make my own… and here it is:
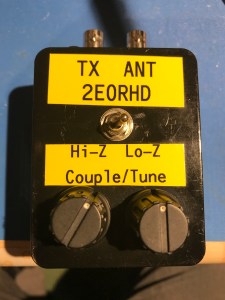
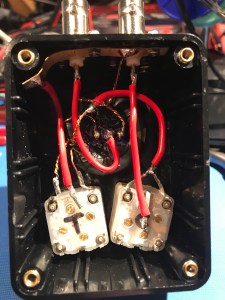
Its a Z-Match ATU which seemed to be the simplest and most effective ATU to build. After looking at countless pictures on google, I choose one and ordered the parts. One week later, when all the bits arrived, I set to the build. Nothing complicated… and on first test it failed 😦
After a quick study of the diagram, I’d worked out what I’d done wrong and rectified the problem! Tested it on a few different antennas and it brought them all down to 1:1 after a lot of playing to find the best results. I’m very happy with this as it was the first project I’ve done that wasn’t a kit!!
Sotabeams FT817 Audio Filter DSP – July 2017
This was installed as I didn’t want to buy the Collins filters and as the FT817nd only has space for one, I thought this would be a better option.
I can’t say I was that impressed… for CW it’s spot on but there is no adjustability/fine tuning. But for SSB… it wasn’t changing much! Yes, looking at the waveform of a scope showed it cutting off the top & bottom but as mentioned, there is no adjustability from outside the case.
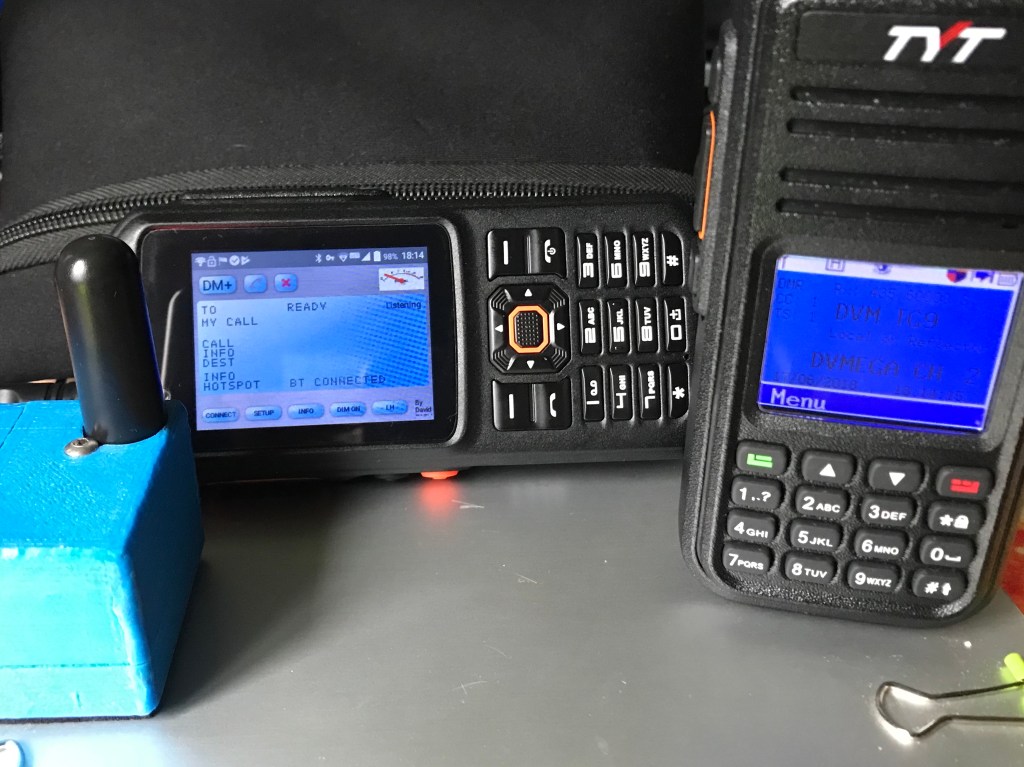
DMR via a T320 – July 2018
Trying out a couple of things lead to me trying the DMR without my tablet. I thought that I might be about to use the T320 as its an Android device to run the software…
Wolfwave
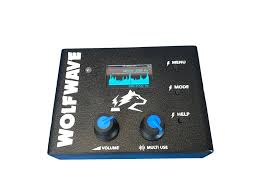
After seeing this online on the Sotabeams website and various YouTube videos, I decided to have a hands-on view of it at the National Hamfest 2019 at the Newark Showground.
At the event, I spoke to Richard (G3CWI) at his stall and seeing the thing in action, with of course the inevitable action of playing with it… I purchased one and I can honestly say “It is brilliant!”. The audio cleanup is excellent, compared to others I’ve used where they make the audio sound as though you are underwater and the adjustable bandpass filtering is a dream to use.
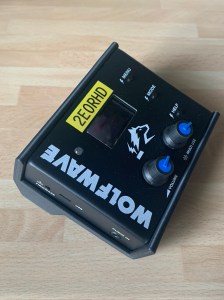

I’ve 3D printed a case for it to protect the dials and the front of the unit while in transit. It also acts as a nice stand to angle the display to make it easier to see when in use.
Digital Modes – Jan 2020
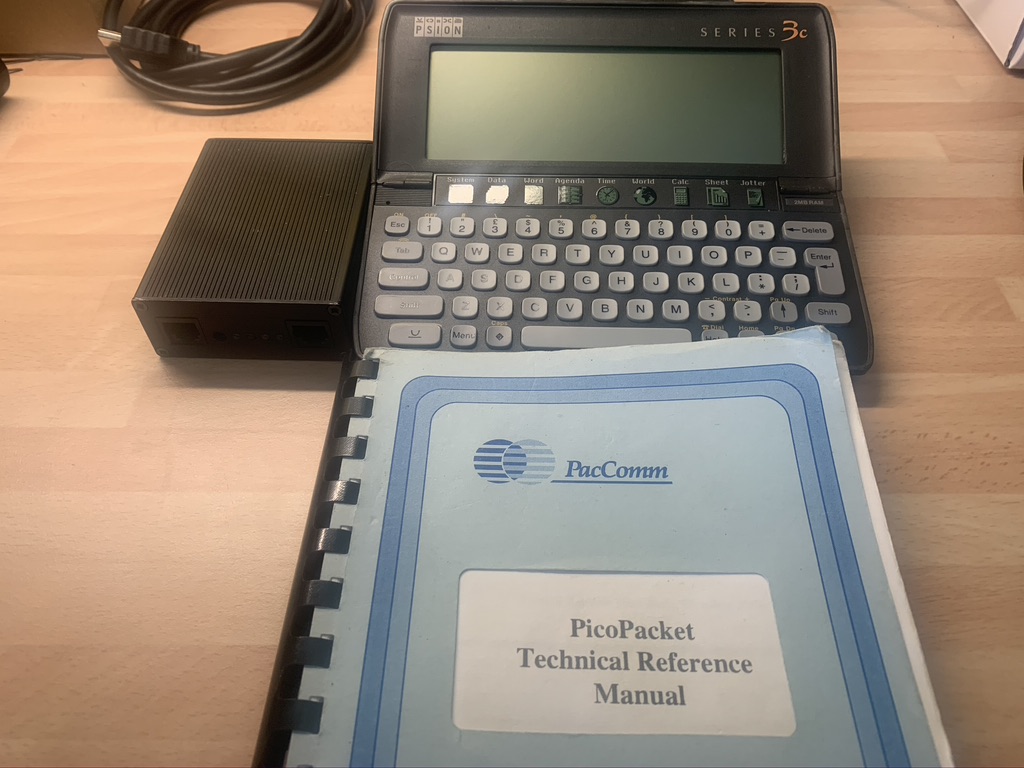
Well I’ve tried various digital modes, the first being Packet Radio using my trusty PicoPacket TNC and an Psion 3C with a Terminal window. For me this was the best thing, accessing the local BBS and routing messages to my Brother. However, those days have gone and PSK31 being my favourite for quite some years but I heard about the NEW FT8 mode and had a try. This was something I couldn’t get any consistent results with so I gave up on it in favour of the old trusted PSK31. Now, about a month ago I thought I’d give the FT8 another try and this time, with the help of the Internet having so much more info on the mode, I was successful… making my first contact within minutes to Russia.
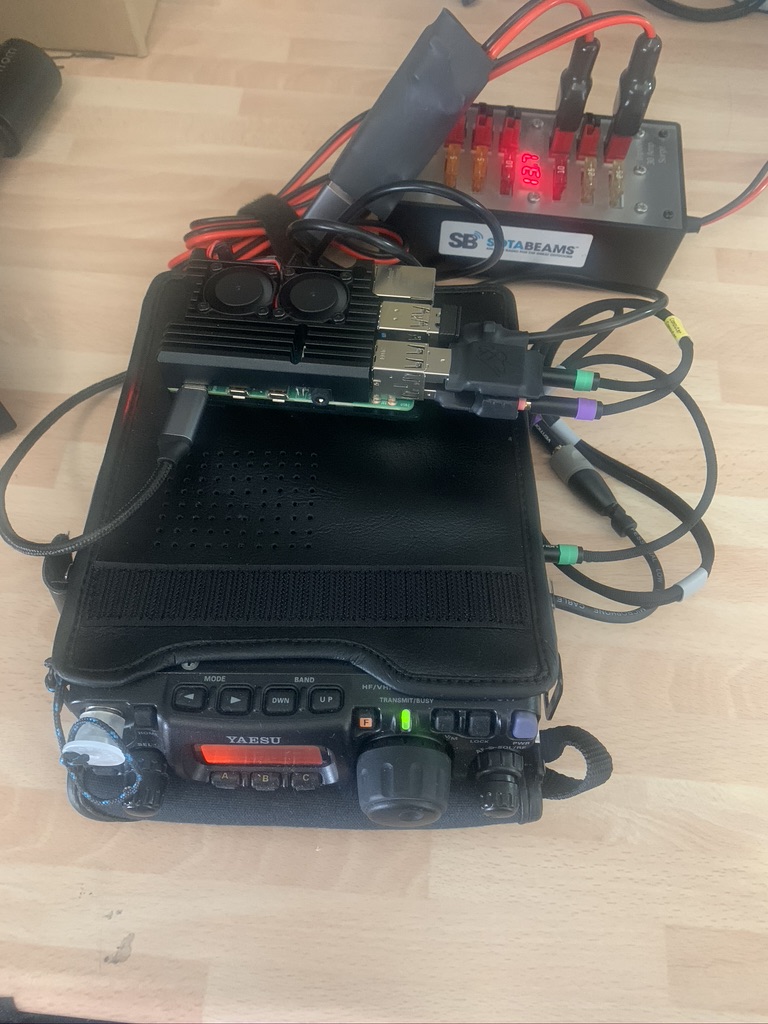
This inspired me to use one of my Raspberry Pi 4’s as a portable FT8 mode terminal connected to my FT817nd, using my iPad as a screen & mouse.
Just want to give a mention to Karl-Heinz Krawczyk DL1GKK and his excellent website for helping me setup my Pi 4 with all the packages required to get this up and running.
My mind is not made up on whether I prefer FT8 over the PSK but in less than an hour, I manages over 20 contacts from all over the East side of me. I think it will be one that I continue to use and I might even try the FT4 mode soon. 🙂
QCX 5W Transceiver – Build
I’ve had this kit for a while but haven’t got round to building it. However, this is my second kit. The first was a version 2 which I bought at a Radio Rally back in 2017 and build it the day after at home. It is a great kit that was designed and used for the YOTA buildathon project to try to get young people interested in Amateur Radio and to give them a practical introduction into electronics by building this single band CW transceiver, which they then got to keep and take home.
The QCX 5w Transceiver made by QRP Labs, comes complete with all the components you need to build it, all you need for the tools. The manual is very comprehensive with good explanations and easy to follow, step-by-step instructions.
Now, the first one I built came to a devastating end after me tinkering with it, as I do!! Explanation: It is not only a transceiver, it comes with some very nice builtin features like a DVM, Frequency counter, signal generator and RF Probe. These are very handy when it comes to building the kit if you don’t own or have access to those pieces of equipment. Now… the manual does tell you to be careful with these as some of them are sensitive bits of kit! Well I accidentally touched the Vcc to one of the signal gens and fried the chip 😦
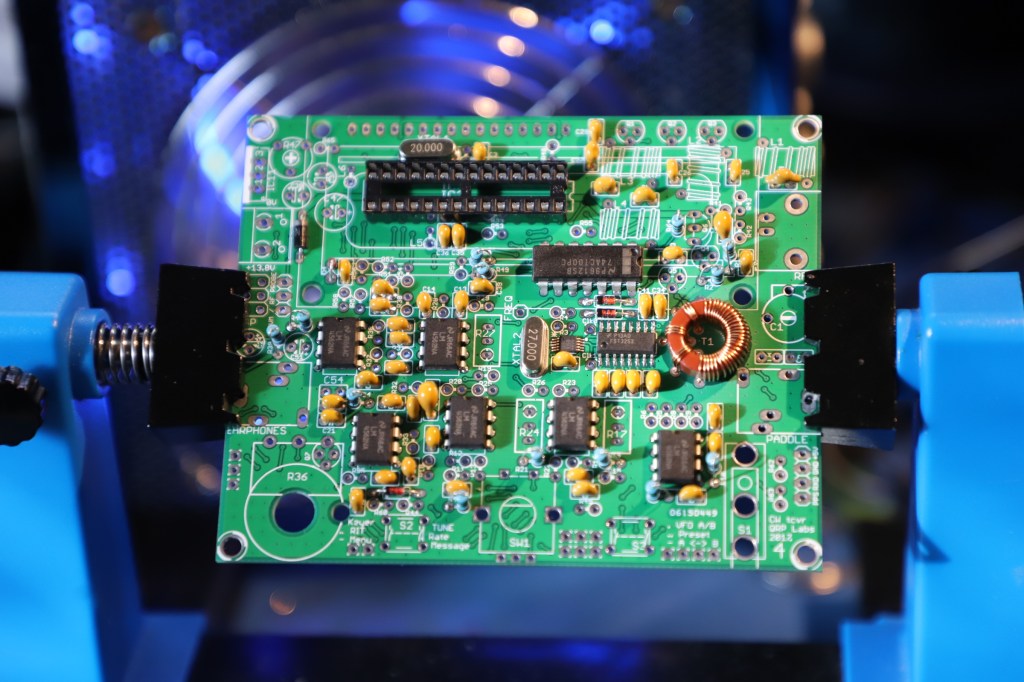
This time I’ve built a Version 4 and still found it a fun project to build. The board hasn’t changed much but the manual has been updated to include some of the “User Mods” that are now part of the standard build, plus details on the new features it now includes.
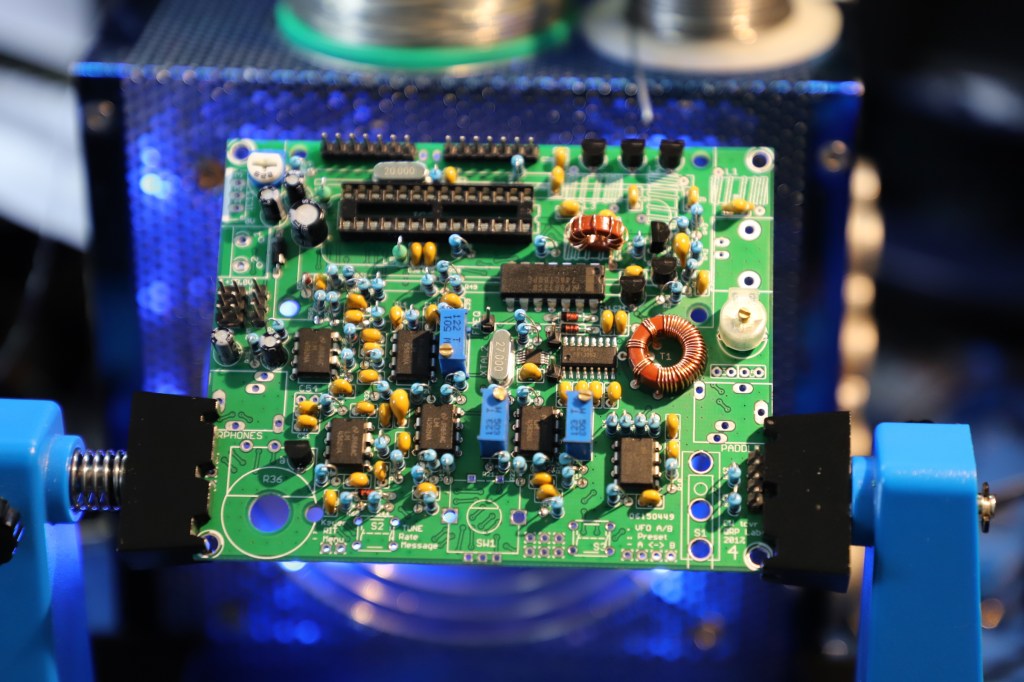
Something to mention is that it is all “Through-hole” components except for two SMD IC’s that are pre-installed on the PCB, which is great as one of those is very tiny! There are also five coils to wind so take this into account, three of those are the LPF for the band you choose when ordering. I’ve opted for the 20 Meter (14 MHz) version.
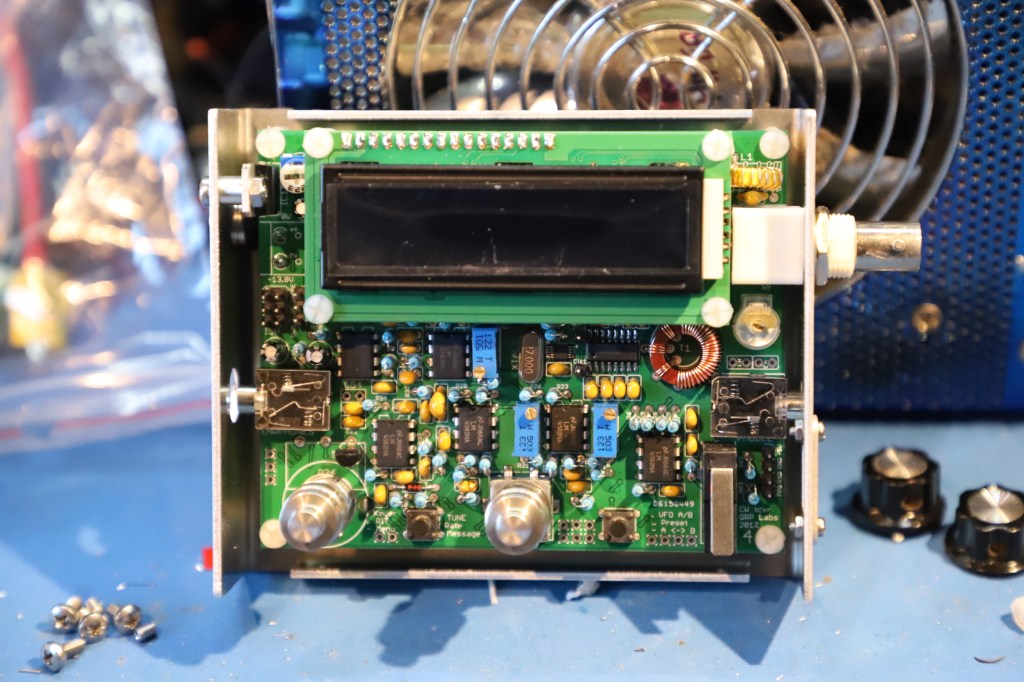
Another thing to mention is that the kit does not include a case to house the radio but there is a link on QRP Labs’ website to a German company that has made one. BaMaTech has made a really nice aluminium case for it that retains it’s compact size.
When I built the first one, there was no cases available for it but this time around, as there is one, I decided to have one after seeing it on the website and couldn’t be bothered to make my own.
Timeframe: I would say it took me a whole day to build but that’s because I’m a bit of a perfectionist and it has to be right. When it was finished and tested, it was producing about 4 watts at 13.8v which was about right. It can be used at a maximum voltage of 16v, so I cranked it up to 15v and that gave me the max 5 watts, 12v give about 3 watts and 10v is 2 watts… Happy with that!
For a full build and setup, with a look through the menus options by Hans Summers, please check out this YouTube video.
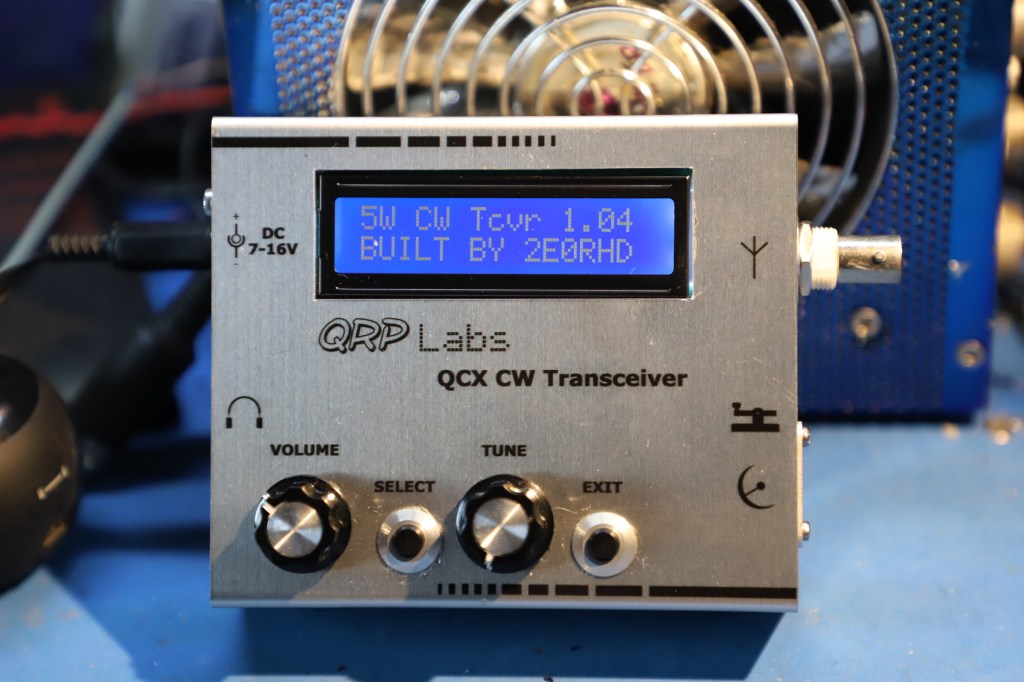
I thought it would be nice to update the firmware as one of the known bugs with the signal meter was quite annoying… if you turn on this feature, there is a constant auditable noise as the screen is continually updated. The kit cames with the firmware already on the chip (T1.00b) and the current firmware (T1.04) that fixes the problem.
Updating the firmware, from some peoples accounts of their attempts, can be an issue. So if it helps, this is how I did it… I used a MacBook Air and a USBasp. The USBasp I already had which I’ve used to program various FPV/Drone devices, otherwise you can use an Arduino as an ISP which I’ve also used in the past, either one should do the job and there is plenty of information on how to setup the Arduino on the web.
Flashing the chip with USBasp
So this is the process I did to get the software on my Mac and the command lines to flash the chip. As a precaution, I removed the IC which has T1.01 and replaced it with the old one from the first kit which had T1.00b installed on it.
Open a Terminal windows and copy and paste the following commands.
1) Install Homebrew: (This will then allow you to install the AVRDUDE software)
ruby -e "$(curl -fsSL https://raw.githubusercontent.com/Homebrew/install/master/install)" < /dev/null 2> /dev/null
2) Install AVRDUDE:
brew install avrdude
3) To flash the firmware on the chip: (Note the T1.04.hex is the filename)
avrdude -c usbasp -p m328p -U flash:w:"T1.04.hex":i
Now power cycle the radio and the start-up splash screen show now show the new version number of the firmware. I’m glad to say that it has fixed the auditable issue with the signal Strength meter so a job worth doing.
Due to the current Corona Virus lockdown, it has not been field tested yet but it worked fine from the house with the builtin CW Decoder working reasonable well on some of the stronger signals.
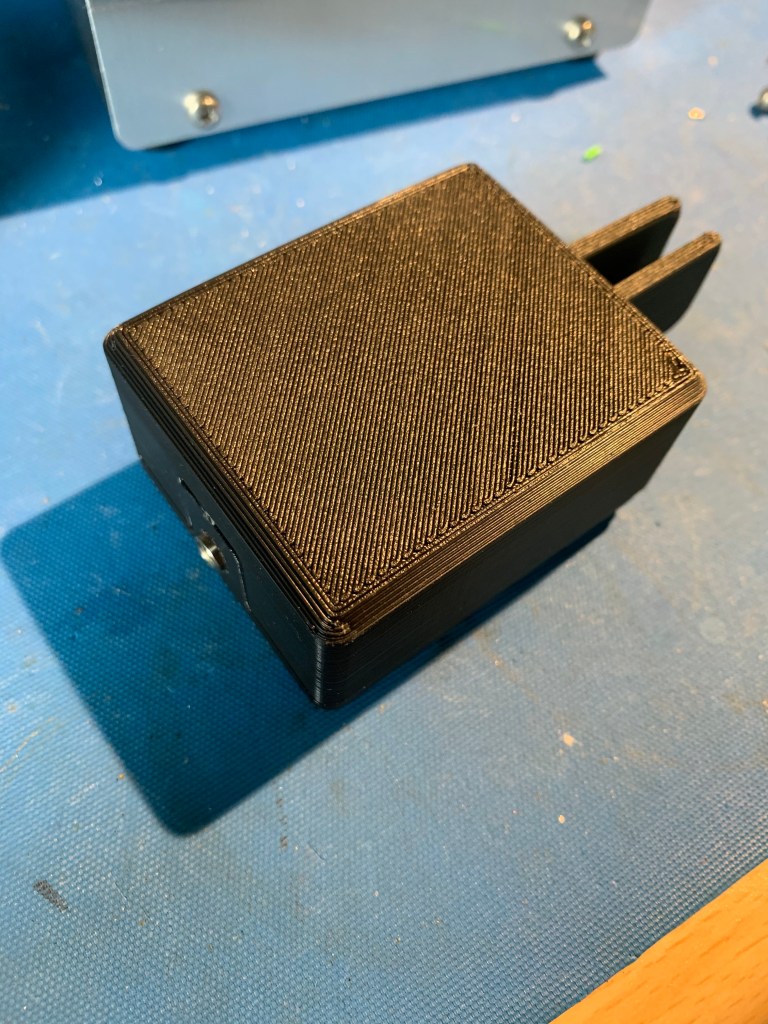
3D Printed Morse Paddle Key
Well after building the QCX CW 5W Transceiver, I thought I’d better have a portable Morse Code key. So after a quick search, I found a good and simple design that would suite my needs. It is a remix by ReallyBigTeech of VO1PWF’s original version and comes in three sizes. Decided to print the larger one but I might try the mini which is quite a bit thinner.
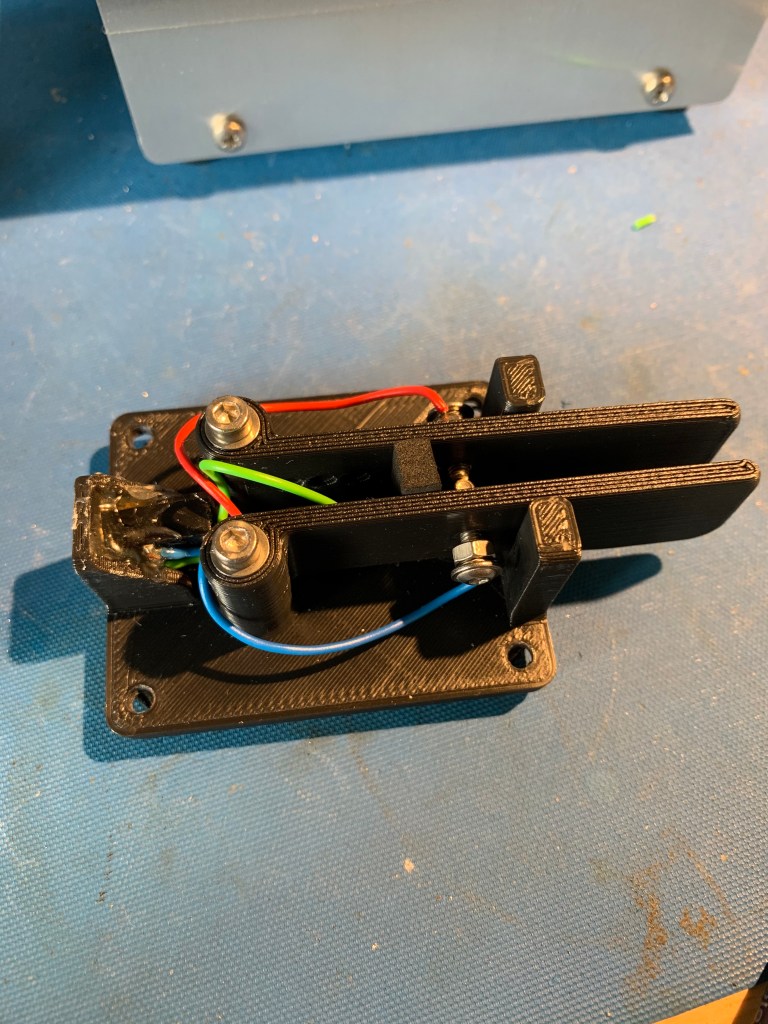
It has a stereo 3.5mm socket that I’ve glued into the back of the base unit for the connects. Cabled it up and plugged it in and it works a treat.
Learning Morse Code…
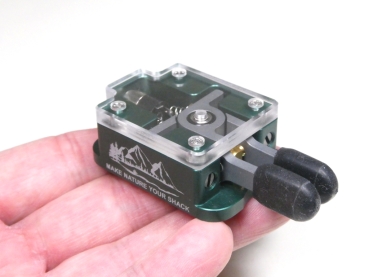
Learning Morse Code… well it’s going slowly, having trouble hearing the differences. I want to learn morse because it would help with SOTA activations. I decided to treat myself to a limited edition mini paddle from BaMaTech to give me some more incentive. Loving the new paddle which even though it is tiny, it works extremely well with a nice feel being fully adjustable.
Follow My Blog
Get new content delivered directly to your inbox.
